Yellowknife's Dancing Skies: Your Guide to Unforgettable Aurora Borealis Encounters

Yellowknife's Dancing Skies: Your Guide to Unforgettable Aurora Borealis Encounters
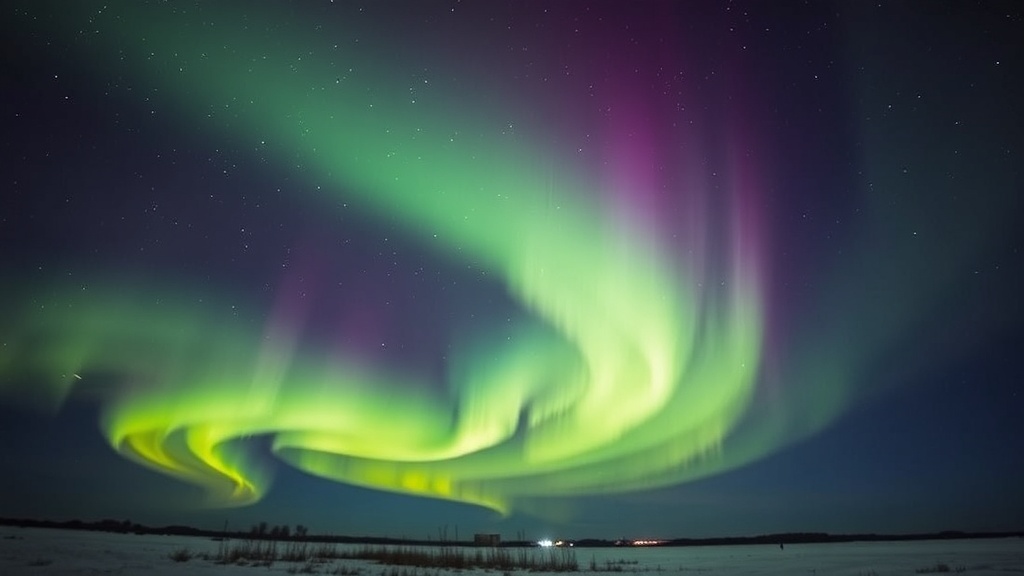
Did you know Yellowknife sits directly beneath the auroral oval, offering some of the world's most consistent and spectacular Northern Lights displays? With over 240 viewing opportunities annually—that's roughly two out of every three nights—our city is a bona fide hotspot for this celestial phenomenon. For many, seeing the Aurora Borealis is a bucket-list dream, a moment of profound awe as vibrant colours ripple across the Arctic sky. This guide will walk you through everything you need to know to maximize your chances of witnessing this natural wonder here in Yellowknife, covering the best times to visit, prime viewing locations, essential gear to keep you comfortable, and even tips for capturing the magic through your camera lens. Prepare yourself for an experience unlike any other.
When's the Best Time to Witness Yellowknife's Aurora?
Timing is often everything when it comes to the Northern Lights, and Yellowknife offers an extended viewing season that's truly enviable. The prime period stretches from mid-August all the way through to mid-April. Why such a wide window? It largely comes down to darkness. We need sufficiently dark skies for the aurora to be visible, and during these months, Yellowknife enjoys long nights, especially as winter deepens.
Within this broad season, there are subtle differences. The late summer and early autumn (August to October) present a unique advantage: milder temperatures. While you still need warm layers, the extreme cold of deep winter isn't typically a factor, making extended outdoor viewing more comfortable. Plus, if you're lucky, you might catch the aurora reflecting off open water—a truly stunning photographic opportunity that freezes in time as the lakes ice over. The trade-off? Snow cover isn't guaranteed, so the landscape might appear a little less 'winter wonderland' if that's what you envision.
As we move into the winter months—November to April—the nights grow significantly longer and darker. This period often coincides with colder, clearer weather patterns, which are ideal for aurora viewing. Crisp, cold air tends to mean fewer clouds, and absolutely no light pollution from the sun. The only minor consideration during the dead of winter is the moon phase; a full moon can sometimes diminish the aurora's intensity for the naked eye, though it can also beautifully illuminate the snowy foreground for photographers. You'll want to check a lunar calendar if you're planning a trip specifically for low-light aurora photography.
Regardless of the month, the best time each night to look for the aurora is typically between 10 PM and 3 AM. However, the lights are unpredictable; they can appear at any moment once it's dark enough, sometimes even as early as 9 PM or lingering past dawn. Patience, therefore, becomes your most valuable companion. Keep an eye on aurora forecasts—websites like the
With a little practice and patience, you'll be well on your way to capturing stunning photographs of Yellowknife's magnificent Northern Lights, creating lasting memories of this truly unforgettable spectacle.